30 Day Satisfaction Guarantee • Free Shipping • Cruelty Free Testing • Vegan Formula
Buy now
Close

What Is the 7-Step Skincare Routine? The Complete Guide

What is the 7-step skincare routine? Complete breakdown of K-beauty's famous method + 7 Skin technique. Get glass skin in 8 weeks.
A photo of the author for this blog post
Written by
Alisan Keesee
October 17, 2025
skin care

The 7-step skincare routine has fundamentally changed how we approach skin health, moving from quick-fix solutions to a comprehensive, preventative care system. Born from Korean beauty philosophy, this method has gained global recognition not because it's trendy, but because it delivers measurable, lasting results.

What makes this approach revolutionary isn't just the number of steps—it's the strategic layering technique that maximizes each product's efficacy. Think of it as building a house: you need a strong foundation, supportive walls, and a protective roof. Similarly, each step in this routine serves a specific purpose, working synergistically to create optimal skin health.

Research from Seoul National University's Department of Dermatology shows that proper product layering can increase absorption rates by up to 70% compared to applying products haphazardly. This isn't about using more products; it's about using products more intelligently.

Understanding the Two Methods: Traditional 7-Step vs. 7 Skin Method

Before diving into the specifics, it's crucial to understand that "7-step skincare" actually refers to two distinct approaches:

The Traditional 7-Step Routine:This comprehensive method uses seven different product categories, each targeting specific skin concerns. It's the gold standard of K-beauty, designed to address cleansing, treatment, and protection in one complete system. This approach typically takes 10-15 minutes and is ideal for those who enjoy a ritualistic self-care routine.

The 7 Skin Method:A more recent innovation focusing on hydration through repetition. Instead of seven different products, you apply the same hydrating toner up to seven times. This method, popularized by Korean actresses, delivers intense hydration in just 5-7 minutes. It's perfect for dehydrated skin or when you need a simplified routine without sacrificing results.

Both methods have scientific backing and devoted followers. Your choice depends on your skin goals, available time, and personal preferences. Many skincare enthusiasts actually combine both methods, using the 7 Skin Method in the morning for quick hydration and the full 7-step routine at night for comprehensive treatment.

The Complete 7-Step Korean Skincare Routine: A Deep Dive

Step 1: Oil-Based Cleanser – The First Defense

When: PM only (skip in the morning)Duration: 60-90 secondsKey Ingredients to Look For: Jojoba oil, grapeseed oil, rice bran oil

The oil cleanser is your first line of defense against the day's accumulation of pollutants, makeup, and sunscreen. Based on the principle that "like dissolves like," oil cleansers break down oil-based impurities that water alone cannot remove.

The Science: Oil cleansers work through a process called lipophilic action, where the oil molecules attach to similar oil-based substances on your skin, lifting them away without disrupting your skin's natural lipid barrier. This is crucial because maintaining barrier integrity prevents transepidermal water loss (TEWL), a primary cause of premature aging.

Application Technique:

  1. Start with completely dry hands and face
  2. Pump 2-3 times into palms
  3. Massage in circular motions, starting from the center of your face
  4. Focus on areas with heavy makeup or congestion (T-zone, around nose)
  5. Add a small amount of warm water to emulsify
  6. Rinse thoroughly with lukewarm water

Common Misconception: Many believe oil cleansing causes breakouts. In reality, properly formulated oil cleansers can help regulate sebum production and prevent clogged pores. The key is choosing non-comedogenic oils and thoroughly emulsifying before rinsing.

Step 2: Water-Based Cleanser – The Deep Clean

When: AM and PMDuration: 30-60 secondspH Level to Target: 5.5-6.5

The second cleanse removes water-based debris including sweat, dirt, and any remaining traces from your oil cleanser. This step ensures a perfectly clean canvas for the treatments to follow.

Choosing Your Cleanser by Skin Type:

  • Oily/Acne-Prone: Gel cleansers with salicylic acid or tea tree
  • Dry/Mature: Cream or milk cleansers with ceramides
  • Sensitive: Micellar water or gentle foam with centella asiatica
  • Combination: pH-balanced gel-to-foam formulations

The pH Factor: Your skin's natural pH hovers around 5.5. Using cleansers with similar pH levels prevents disruption of your acid mantle—the protective film that guards against bacteria and moisture loss. Studies show that using high-pH cleansers can increase bacterial colonization by up to 40% within hours.

Pro Technique: The 60-second rule. Massage your cleanser for a full minute to allow surfactants time to properly bind with impurities. This simple change can dramatically improve skin clarity within weeks.

Step 3: Exfoliator – The Renewal Catalyst

When: 2-3 times weekly (PM preferred)Duration: Varies by typeKey Decision: Chemical vs. Physical

Exfoliation removes dead skin cells that accumulate on the surface, revealing fresher, more radiant skin underneath. This step is crucial for preventing clogged pores, improving product absorption, and stimulating cellular turnover.

Chemical Exfoliants (Preferred by Dermatologists):

AHAs (Alpha Hydroxy Acids):

  • Glycolic Acid (smallest molecule, deepest penetration)
  • Lactic Acid (gentler, adds hydration)
  • Mandelic Acid (best for sensitive skin)
  • Best for: Surface texture, fine lines, hyperpigmentation
  • Concentration: Start with 5-7%, gradually increase to 10-15%

BHAs (Beta Hydroxy Acids):

  • Salicylic Acid (oil-soluble, penetrates pores)
  • Best for: Blackheads, acne, oily skin
  • Concentration: 0.5-2%

PHAs (Polyhydroxy Acids):

  • Gluconolactone, Lactobionic Acid
  • Best for: Sensitive skin, rosacea-prone
  • Benefits: Gentle exfoliation with antioxidant properties

Physical Exfoliants:Choose products with round, smooth particles (jojoba beads, rice powder) rather than jagged shells or pits that can create micro-tears.

Exfoliation Schedule by Skin Type:

  • Oily: 3x weekly (can alternate BHA and AHA)
  • Normal: 2x weekly
  • Dry/Sensitive: 1x weekly with gentle PHA or enzyme exfoliant
  • Mature: 2-3x weekly with AHA focus

Step 4: Toner – The pH Balancer and Prep Master

When: AM and PMApplication: Within 1 minute of cleansing while skin is dampAmount: 3-5 drops or until skin feels plump

Modern K-beauty toners are nothing like the astringent, alcohol-laden toners of the past. Today's formulations are hydrating essences that prep skin for optimal absorption of subsequent products.

Types of Toners:

Hydrating Toners:

  • Contains: Hyaluronic acid, glycerin, beta-glucan
  • Purpose: Immediate hydration boost
  • Best for: All skin types, especially dry/dehydrated

Exfoliating Toners:

  • Contains: Low-concentration acids (2-5%)
  • Purpose: Daily gentle exfoliation
  • Best for: Those who can't tolerate leave-on exfoliants

Balancing Toners:

  • Contains: Niacinamide, zinc, witch hazel (alcohol-free)
  • Purpose: Regulate oil production
  • Best for: Oily, combination skin

Application Methods:

  1. Patting Method: Pour into palms, press gently into skin
  2. 7 Skin Method: Layer the same toner up to 7 times
  3. Cotton Pad Method: Gentle swipe (wastes product but good for removing last traces of cleanser)
  4. Misting Method: Decant into spray bottle for even distribution

The 7 Skin Method Deep Dive:This technique deserves special attention as it can replace multiple hydrating steps:

  • Layer 1-2: Initial hydration
  • Layer 3-4: Plumping effect begins
  • Layer 5-6: Visible "chok-chok" (bouncy) texture
  • Layer 7: Maximum hydration achieved

Wait 15-30 seconds between each layer for proper absorption. This method can increase skin hydration by up to 50% according to Korean skincare studies.

Step 5: Essence – The Treatment Accelerator

When: AM and PMTexture: Slightly viscous, water-likeKey Benefit: Enhances all subsequent products

Essences are the heart of Korean skincare—a category that barely existed in Western beauty until K-beauty's influence. These lightweight, concentrated formulas bridge the gap between toner and serum.

What Makes Essences Unique:

  • Smaller molecular size than serums for deeper penetration
  • Contains fermented ingredients for better bioavailability
  • Focuses on cellular turnover and repair
  • Provides cumulative benefits over time

Key Ingredients in Essences:

  • Fermented Ingredients: Galactomyces, saccharomyces (yeast ferments)
  • Snail Mucin: 90% similar to human skin composition, repairs and hydrates
  • Propolis: Anti-inflammatory, antibacterial
  • Ginseng: Increases circulation, brightens

Application Technique:Rather than rubbing, use the "press and release" method:

  1. Pour essence into palms
  2. Gently press palms together
  3. Press onto face starting from the center
  4. Move outward with gentle pressing motions
  5. Include neck and décolletage
  6. Finish with light tapping to enhance absorption

Step 6: Serum/Ampoule/Treatment – The Targeted Solution

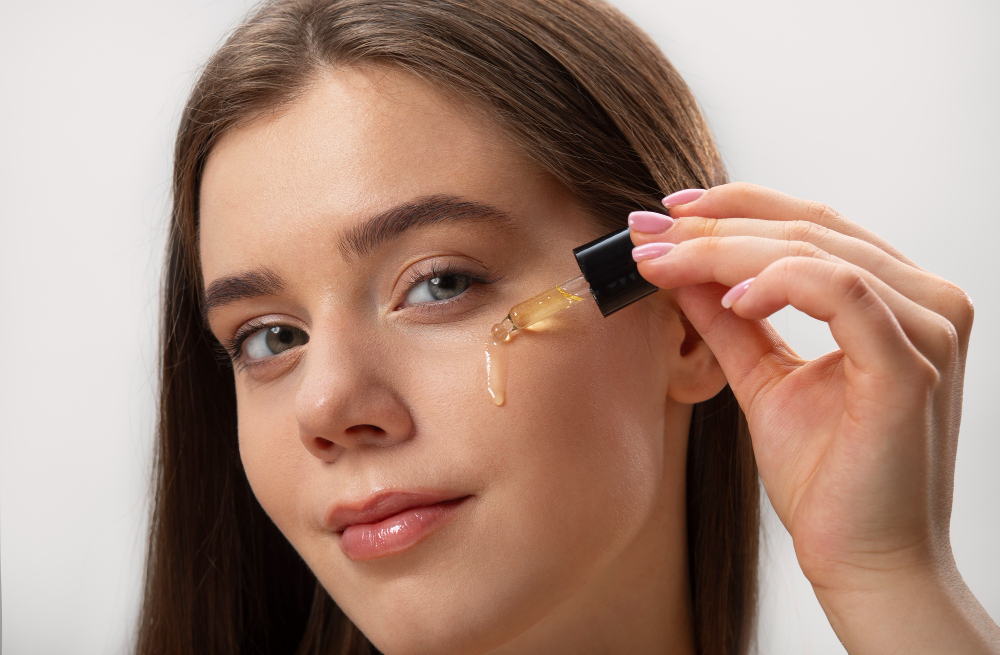
When: AM and/or PM depending on ingredientsAmount: 2-3 drops typically sufficientOrder: Thinnest to thickest if using multiple serums

This is where you address specific skin concerns with concentrated active ingredients. Serums contain the highest percentage of active ingredients in your routine, making them the workhorses of skincare.

Choosing Your Power Players:

For Brightening and Even Tone:

  • Vitamin C (L-Ascorbic Acid): 10-20% concentration
  • Niacinamide: 5-10% for pigmentation
  • Alpha Arbutin: 2% for gentle brightening
  • Tranexamic Acid: 2-5% for melasma

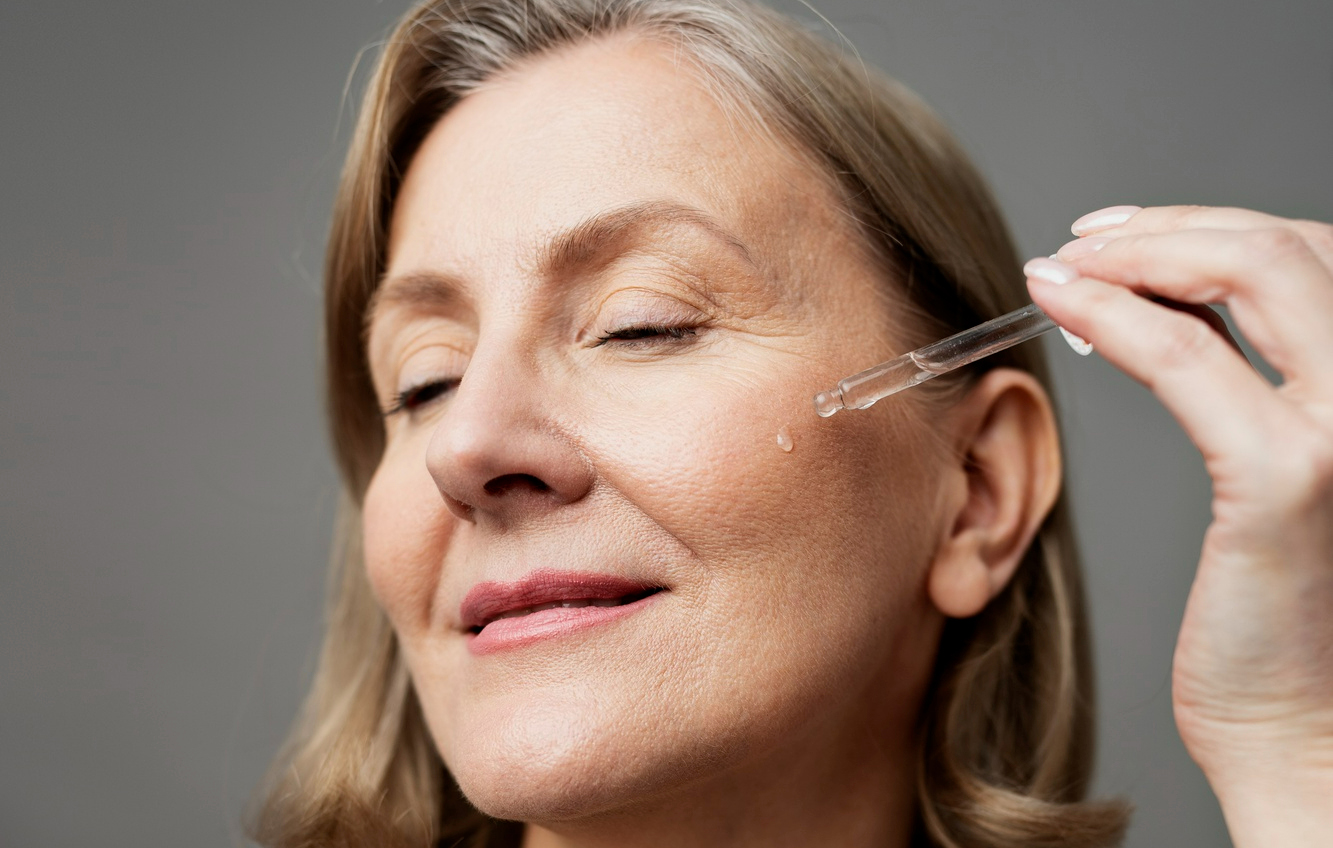
For Anti-Aging and Protection:This is where ferulic acid becomes a game-changer. While many know about retinol and peptides, ferulic acid offers unique benefits that make it essential for any anti-aging routine.

The Ferulic Acid Advantage:Ferulic acid is a powerful plant-based antioxidant that does more than just fight free radicals. Research published in the Journal of Investigative Dermatology shows that ferulic acid:

  • Doubles the photoprotection of vitamins C and E
  • Remains stable under UV exposure (unlike vitamin C alone)
  • Reduces thymine dimer formation (UV-induced DNA damage) by 75%
  • Increases collagen production by up to 30%

When choosing a ferulic acid serum, look for formulations that combine it with vitamins C and E. This synergistic combination, often called the "gold standard" of antioxidant protection, provides 8x more protection against environmental damage than vitamin C alone. Apply it in the morning under sunscreen for maximum protection, or at night for repair and regeneration.

Other Anti-Aging Actives:

  • Retinol/Retinoids: Start at 0.25%, increase gradually
  • Peptides: Matrixyl, argireline for collagen support
  • Bakuchiol: Natural retinol alternative
  • Growth Factors: EGF for cellular regeneration

For Acne and Oil Control:

  • Salicylic Acid: 0.5-2%
  • Benzoyl Peroxide: 2.5-5%
  • Azelaic Acid: 10-20%
  • Centella Asiatica: For healing and prevention

Layering Multiple Serums:If using multiple serums:

  1. Water-based before oil-based
  2. Lowest to highest pH
  3. Thinnest to thickest consistency
  4. Most important concern first (best absorption)

Timing Considerations:

  • Morning: Antioxidants (Vitamin C + Ferulic Acid), hydrating serums
  • Evening: Retinoids, exfoliating acids, repair serums
  • Never combine: Retinol with acids, Vitamin C with niacinamide (unless formulated together)

Step 7: Eye Cream – The Delicate Area Specialist

When: AM and PMAmount: Rice grain size for both eyesApplication: Ring finger for gentlest pressure

The eye area has the thinnest skin on your face (0.5mm vs 2mm elsewhere) and lacks oil glands, making it prone to showing first signs of aging.

Targeted Ingredients by Concern:

  • Dark Circles: Caffeine, vitamin K, kojic acid
  • Puffiness: Caffeine, green tea, cucumber extract
  • Fine Lines: Peptides, retinol (gentler formulations)
  • Dryness: Ceramides, squalane, hyaluronic acid

The Correct Application:

  1. Dot product along orbital bone
  2. Gently tap with ring finger from inner corner outward
  3. Never pull or stretch the skin
  4. Include "11 lines" between eyebrows
  5. Don't forget upper eyelid (if product is safe for this area)

Step 8: Moisturizer – The Protective Seal

When: AM and PMType varies by skin type and climateDon't forget: Neck and chest

Moisturizer seals in all previous layers while providing its own benefits. Think of it as the protective roof of your skincare house.

Moisturizer Categories:

Gel Moisturizers:

  • Light, water-based
  • Quick absorption
  • Best for: Oily, acne-prone, summer months
  • Key ingredients: Hyaluronic acid, aloe, green tea

Lotion Moisturizers:

  • Balanced water-to-oil ratio
  • Suitable for most skin types
  • Best for: Normal to combination skin
  • Key ingredients: Ceramides, niacinamide

Cream Moisturizers:

  • Rich, occlusive
  • Long-lasting hydration
  • Best for: Dry, mature, winter months
  • Key ingredients: Shea butter, ceramides, cholesterol

Sleeping Masks/Night Creams:

  • Ultra-rich, treatment-focused
  • Overnight repair and regeneration
  • Best for: PM routine, intensive treatment
  • Key ingredients: Peptides, retinol, bakuchiol

The Sandwich Method for Dry Skin:

  1. Apply hydrating toner
  2. Apply moisturizer
  3. Reapply toner
  4. Final layer of moisturizer This technique can increase hydration by 65%.

Step 9: Sunscreen – The Non-Negotiable Finale (AM Only)

When: Every morning, regardless of weatherAmount: 1/4 teaspoon for faceReapplication: Every 2 hours of sun exposure

If you do nothing else, do this. Sunscreen prevents 90% of skin aging and is your best defense against skin cancer.

Chemical vs Physical Sunscreens:

Chemical (Organic) Filters:

  • Absorb UV rays and convert to heat
  • Ingredients: Avobenzone, octinoxate, oxybenzone
  • Pros: Lightweight, no white cast
  • Cons: Can irritate sensitive skin, needs 20 minutes to activate

Physical (Mineral) Filters:

  • Reflect and scatter UV rays
  • Ingredients: Zinc oxide, titanium dioxide
  • Pros: Immediate protection, better for sensitive skin
  • Cons: Can leave white cast, heavier texture

The New Generation: Hybrid FormulasCombine both types for optimal protection with better cosmetic elegance.

Application Tips:

  • Apply after moisturizer fully absorbs (wait 5 minutes)
  • Use separate sunscreen, not moisturizer with SPF
  • Don't forget: Ears, neck, hands
  • Reapply over makeup with spray or cushion SPF

Customization Strategies: Making the Routine Work for You

By Skin Type: Detailed Protocols

Oily/Acne-Prone Skin Protocol:

Morning:

  1. Gel cleanser with BHA
  2. Balancing toner with niacinamide
  3. Light essence
  4. Ferulic acid serum with vitamin C (fights acne scarring)
  5. Hyaluronic acid serum
  6. Gel moisturizer
  7. Mineral sunscreen SPF 30+

Evening:

  1. Oil cleanser (yes, even for oily skin!)
  2. Foaming cleanser
  3. BHA toner (3x weekly)
  4. Essence
  5. Retinol serum (alternate nights with BHA)
  6. Light night moisturizer

Dry/Dehydrated Skin Protocol:

Morning:

  1. Cream cleanser or water only
  2. Hydrating toner (consider 7 Skin Method)
  3. Hydrating essence
  4. Ferulic acid serum (protects barrier function)
  5. Hyaluronic acid on damp skin
  6. Face oil mixed with cream moisturizer
  7. Moisturizing sunscreen

Evening:

  1. Oil cleanser
  2. Cream cleanser
  3. Gentle PHA exfoliant (2x weekly)
  4. Multiple toner layers
  5. Essence
  6. Ceramide serum
  7. Face oil
  8. Sleeping mask

Sensitive Skin Protocol:

Morning:

  1. Micellar water or gentle cleanser
  2. Calming toner with centella
  3. Soothing essence
  4. Ferulic acid serum (anti-inflammatory properties)
  5. Ceramide moisturizer
  6. Mineral sunscreen

Evening:

  1. Cleansing balm
  2. Gentle cream cleanser
  3. Calming toner
  4. Barrier repair essence
  5. Ceramide/cholesterol serum
  6. Rich moisturizer

Combination Skin Protocol:

Zone Treatment Approach:

  • T-Zone: Use oil-controlling products
  • Cheeks: Use hydrating products
  • Apply products strategically, not uniformly

Mature Skin Protocol (40+):

Morning:

  1. Cream cleanser
  2. Antioxidant toner
  3. Peptide essence
  4. Vitamin C + Ferulic acid serum (maximum protection)
  5. Growth factor serum
  6. Eye cream with peptides
  7. Rich moisturizer
  8. SPF 50

Evening:

  1. Cleansing oil
  2. Cream cleanser
  3. AHA exfoliant (3x weekly)
  4. Hydrating toner layers
  5. Retinol (start 2x weekly, build up)
  6. Peptide serum
  7. Face oil
  8. Night cream

Seasonal Adjustments: Adapting Your Routine Year-Round

Spring Transition:

  • Gradually lighten moisturizers
  • Increase exfoliation frequency
  • Add antioxidants for allergy season
  • Switch to lighter sunscreen textures

Summer Modifications:

  • Gel-based products predominate
  • Increase cleansing if sweating more
  • Add mattifying primers
  • Consider vitamin C + ferulic acid for extra sun protection
  • Lighter night routine

Fall Preparation:

  • Begin adding richer textures
  • Introduce retinoids (less sun exposure)
  • Focus on barrier repair
  • Add face oils gradually

Winter Intensive:

  • Double up on hydrating layers
  • Reduce exfoliation frequency
  • Add occlusive ingredients
  • Consider humidifier for nighttime
  • Protect barrier with ceramides

Troubleshooting Common Issues

"My skin feels overwhelmed"

  • Introduce one product at a time (2-week intervals)
  • Start with core routine: Cleanse, tone, moisturize, SPF
  • Add treatments gradually

"Products are pilling"

  • Allow more time between steps
  • Check silicone compatibility
  • Apply in thinner layers
  • Pat, don't rub

"Breaking out after starting routine"

  • Could be purging (normal with actives) - lasts 4-6 weeks
  • Check expiration dates
  • Review comedogenic ratings
  • Simplify routine temporarily

"Not seeing results"

  • Consistency is key - minimum 6-8 weeks
  • Take progress photos
  • Adjust concentrations of actives
  • Consider professional consultation

The Results Timeline: What to Expect

Week 1-2:

  • Immediate hydration improvement
  • Softer skin texture
  • Possible purging begins

Week 3-4:

  • Oil production balances
  • Pores appear refined
  • Skin tone begins evening

Week 5-8:

  • Fine lines soften
  • Hyperpigmentation fades
  • "Glow" becomes noticeable

Month 3-6:

  • Significant improvement in skin concerns
  • Compliments from others
  • Reduced makeup need
  • Established routine becomes second nature

Budget-Friendly Alternatives and DIY Options

You don't need expensive products for an effective 7-step routine:

Affordable Swaps:

  • Oil cleanser → Pure jojoba oil
  • Essence → Diluted glycerin toner
  • Multiple serums → One multitasking serum with ferulic acid
  • Sleeping mask → Thick layer of regular moisturizer

Where to Invest:

  1. Sunscreen (never compromise)
  2. Treatment serum for main concern
  3. Gentle, pH-balanced cleanser

Where to Save:

  1. Toner (DIY possible)
  2. Basic moisturizer
  3. Eye cream (can use regular moisturizer carefully)

Building Your Personalized 7-Step Routine: Action Steps

  1. Identify your primary skin concern
  2. Determine your skin type (may differ by zone)
  3. Start with basics: Cleanser, moisturizer, sunscreen
  4. Add treatment products one at a time
  5. Monitor and adjust based on skin response
  6. Be consistent for at least 8 weeks
  7. Document progress with photos

Remember, the "perfect" routine is the one you'll actually stick to. Whether you choose the full 7-step protocol, the 7 Skin Method, or a customized hybrid, consistency trumps complexity every time.

Conclusion: Your Journey to Transformed Skin

The 7-step skincare routine isn't just about products—it's about understanding your skin's needs and responding with targeted, thoughtful care. Whether you're drawn to the ritualistic nature of K-beauty or simply want better skin, this comprehensive approach offers a framework for success.

Start slowly, listen to your skin, and remember that the best routine is one that evolves with you. And when choosing your treatment products, consider incorporating scientifically-backed ingredients like ferulic acid that offer multiple benefits in a single step—protecting, correcting, and preventing future damage.

Your skin is unique, and your routine should be too. Use this guide as your roadmap, but don't be afraid to take detours that work better for your individual needs. Here's to your journey toward healthier, more radiant skin—one step at a time.

Quick Reference: Your 7-Step Cheat Sheet

Morning Routine:

  1. Water-based cleanser
  2. Toner
  3. Essence
  4. Antioxidant serum (Vitamin C + Ferulic Acid)
  5. Eye cream
  6. Moisturizer
  7. SPF

Evening Routine:

  1. Oil cleanser
  2. Water-based cleanser
  3. Exfoliant (2-3x weekly)
  4. Toner
  5. Essence
  6. Treatment serum
  7. Night cream

Remember: Consistency > Perfection. Your skin will thank you for the commitment to care, regardless of whether you do 3 steps or 7.


Disclaimer: Ferulic acid serum is a cosmetic product. This product is not FDA approved. Ferulic acid is not a drug and it does not treat any medical conditions.